
The Complete Guide to Supplying Your Own Artwork for Interpretation Panels
If you are creating your own artwork for an interpretation board, there are several key factors to bear in mind to ensure that your interpretation panel design is both engaging and attractive to your audience.
How much content should you include on an interpretation sign?
Don’t overdo it! Keeping information concise is very important when writing copy for your sign. We recommend aiming for around 300 words in a typical A1 panel. This allows for the text to be printed at a size that is easily readable for most people.
Structuring the text with subheadings and relevant images will draw people’s eyes to important details and make the content feel more digestible, so visitors can easily absorb the information while on-site.
Also, remember that your visitors are likely to be of mixed ages and abilities, so a friendly and informative tone of voice is best. If you have further information you’d like to share, consider using a QR code to point people to other resources, such as a website or social media page.
Font Styles and Sizes
Serif fonts are best for larger blocks of text, but decorative or fun fonts can be really effective for headings or call-out boxes.
San serif fonts are ideal for wayfinding signage and are best for header panels or finger posts.
We would recommend a minimum font size of 21pt for body text on an A1 panel. But the bigger it is, the easier it is to read.
Images for your nature signs and interpretation panels
They need to be of good quality! We can’t stress this enough. Images are what will catch people’s eye and make them stop and read. If you don’t already have high resolution images, consider asking someone to take some for you if possible.
High resolution means that the image files are large (over 3MB for a JPEG), so they will reproduce really well in print with sharp lines and nice bright colours.
The exception to this is historical images, where sometimes high quality is not possible. But don’t worry, they can still be used and often work really well, adding character and charm to your heritage interpretation panel.
If you have old photos or hand-drawn sketches, try to get them scanned in at a high resolution setting (300 dpi is best).
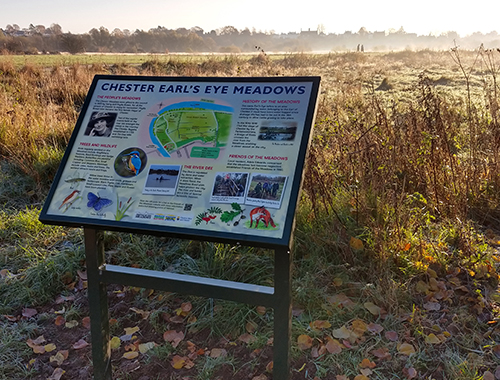
Best practice for including maps within your design
Many interpretation boards have maps for visitors to access and orient themselves on site. If you are creating a map, simplicity is key.
Keep the graphics simple and easy to understand. Use symbols to point out key areas of interest or suggestions for your visitors. Use colour to identify footpaths, roads and access points, as well as a key or labels, so people know what they are.
You should also think about orientation; does the map reflect the view from where they are standing? Most importantly, don’t forget to use a nice big ‘you are here’ label!
How to supply your artwork
Sending your final artwork for the interpretation sign is a key part of the process, and it’s important to get it right. Your final artwork needs to be sent to us as a high resolution PDF file. This will mean that your artwork will reproduce to the highest quality when printed. If possible, try to make sure it’s exported using CMYK & with fonts embedded or outlined. Large files can be sent to us using our Hightail link (on our website, or ask us to send them to you).
Margins and bleed
When setting up your artwork, remember to include an allowance for the framing, which will overlap the edges of the board (just like a picture frame). Any text & images need to be at least 20mm from the inner edge of the frame to make sure it’s easy to read and nothing important is cut off.
A ‘bleed’ in print is an additional area around the edges of your page, which, in traditional printing, is cut off afterwards. We don’t need any allowance for this, as large format printers can print ‘edge-to-edge’, so our materials are cut to size before printing.
Proofing & approval of your interpretation panel design
The final stage of the process is receiving a proof either on paper or as a PDF. This is your last chance to check everything and give final approval for print. Get someone to proofread the text for you, checking spelling and grammar. Also, ensure that all the images appear as they are supposed to. Sponsor logos may need to be checked/approved by the relevant organisation.
Once you’re happy, just let us know you approve the artwork, and we will send your order through to production.
Speak to our team
If you need further assistance with the design of your interpretation panel or nature sign, please get in touch with our experienced team, who are on hand to offer guidance on your artwork.
Alternatively, if you would prefer us to manage the design of your panel, we have a team of in-house graphic designers who can work closely with you to bring your vision to life. Enquire about design services here.
Sign up to our Newsletter
Sign up to our newsletter for all the latest from Shelley Signs